Mastering Hand Pose Part2: A Practical Guide to Throwing, Taking, and Expressive Gestures
When you dive into the world of 3D character animation or digital illustration, the hands are often the first place where realism breaks down. While basic resting positions are straightforward, dynamic interactions require a nuanced understanding of mechanics. This is where Hand Pose Part2 becomes essential for creators who want to elevate their work beyond static mannequins. Unlike simple open-palm gestures, this collection focuses on active, functional movements that convey intent and interaction.
The specific poses included in this set—throwing, taking, little finger, clawing, and hi—are not just random shapes. They represent fundamental human interactions with objects and each other. However, many beginners and even seasoned professionals stumble when applying these assets. The difference between a pose that looks natural and one that feels robotic often lies in the subtle details of weight distribution, finger curvature, and contextual appropriateness. Understanding how to correctly implement these five distinct gestures can significantly improve the perceived quality of your projects.
The Mechanics of Action: Throwing and Taking
Two of the most critical poses in Hand Pose Part2 are throwing and taking. These are dynamic actions that imply motion before and after the frame you are rendering. A common mistake here is treating these as static grips. When a character is throwing, the hand is not just holding an object; it is releasing it. The fingers should show tension in the earlier phases of the throw and relaxation or follow-through in the later stages. If you use a rigid "holding" asset for a throwing animation, the object will appear glued to the palm rather than propelled by force.
Similarly, the taking pose requires careful attention to the approach. Beginners often align the hand perfectly with the object’s center, which looks unnatural. In reality, humans adjust their grip as they reach. The fingers should be slightly spread and curved, anticipating the object's shape. If you ignore this nuance, the interaction looks like a collision rather than a deliberate action. To avoid this, check the alignment of the fingertips against the object’s surface. Ensure there is a slight gap if the object hasn't been grasped yet, or a gentle compression if it has just been seized.
Avoiding the "Claw" Trap
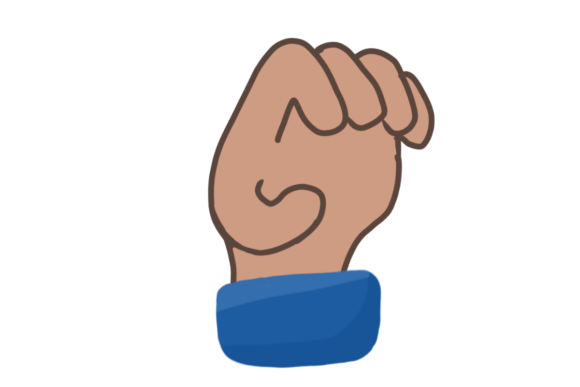
The clawing pose is perhaps the most misunderstood element in this set. It is frequently used incorrectly for generic grabbing actions, resulting in characters that look like they are perpetually startled or aggressive. Clawing is a specific tense gesture, often associated with fear, aggression, or intense effort. Using it for casual interactions, such as picking up a coffee cup, creates cognitive dissonance for the viewer.
To use the claw pose effectively, reserve it for high-tension scenarios. For example, if a character is reaching for a ledge while hanging precariously, the claw shape communicates desperation and strain. If you need a neutral grab, opt for a softer, more relaxed finger curvature. Always ask yourself: What is the emotional state of the character? If the answer is calm, the claw pose is likely the wrong choice. Adjusting the tension in the knuckles and the spread of the fingers can transform a menacing claw into a determined grip, but only if the context supports it.
Nuance in Social and Subtle Gestures
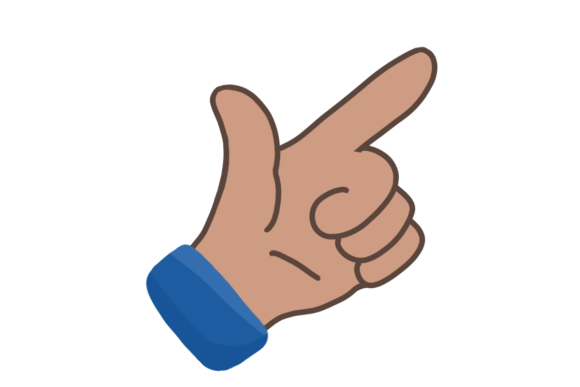
Not all hand movements are about physical manipulation. The hi wave and the little finger pose serve communicative purposes, and their execution relies heavily on cultural context and timing. The "hi" gesture seems simple, but it is prone to looking stiff if the wrist is locked. A natural wave involves rotation at the wrist and a slight looseness in the fingers. If your model’s hand looks like a rigid paddle, it breaks immersion. Consider adding a slight tilt to the palm and varying the height of the wave to match the character’s energy level.
The little finger pose, often associated with elegance or precision, is another area where subtlety matters. This gesture is frequently used in contexts involving tea drinking, delicate handling of small items, or specific cultural signals. A common error is extending the little finger too rigidly while keeping the other fingers unnaturally straight. In reality, when the little finger is extended for emphasis or balance, the other fingers usually maintain a soft, natural curve. Over-exaggerating this pose can make a character appear caricatured rather than refined. Use it sparingly and ensure the rest of the hand remains relaxed to maintain believability.
Common Pitfalls in Implementation and Selection
When evaluating or downloading assets like Hand Pose Part2, many users overlook compatibility and scale. A pose that looks perfect on one rig may cause clipping or distortion on another due to differences in bone structure or finger length. Before committing to a purchase or download, always verify the rig compatibility. Check if the poses are designed for generic humanoids or specific software ecosystems. Ignoring this step can lead to hours of manual adjustment, negating the time-saving benefit of using pre-made poses.
Another frequent oversight is lighting and shading interaction. Hands are complex geometric forms with many nooks and crannies. A pose that looks clear in a neutral viewport might cast confusing shadows in a rendered scene. For instance, the clawing pose can create deep shadows between fingers that look like holes in the mesh if the lighting is too harsh. Always test your poses in the final lighting environment. If the silhouette reads poorly, consider adjusting the finger spacing or the camera angle rather than abandoning the pose entirely.
Practical Checklist for Better Results
To ensure you get the most out of these hand poses, keep this practical checklist in mind during your workflow:
- Context First: Match the pose to the character’s intent. Is the action aggressive (claw), casual (hi), or functional (taking)?
- Check Silhouettes: Zoom out and view the hand in solid black. Can you clearly identify the gesture? If not, adjust the finger spread.
- Verify Rig Compatibility: Ensure the bone hierarchy matches your character model to prevent twisting or breaking joints.
- Observe Real Life: Record yourself performing the action. Notice how your wrist bends and how your fingers distribute weight. Mimic these micro-movements.
- Lighting Test: Render a quick preview to check for unwanted shadows or clipping issues, especially with tight grips like throwing or taking.
By paying attention to these details, you transform Hand Pose Part2 from a simple library of assets into a powerful tool for storytelling. The goal is not just to have hands that move, but to have hands that communicate. Whether you are creating a marketing video, a game character, or an educational animation, the credibility of your work hinges on these small, human truths. Avoid the temptation to rush through the setup. Take the time to refine the wrist angles, soften the finger curves, and align the intent with the action. Your audience may not consciously notice the perfect "taking" pose, but they will definitely feel the awkwardness of a bad one. Invest in the nuance, and your creations will resonate with greater authenticity and professional polish.